йғЁзҪІзәўеёҪpcsй«ҳеҸҜз”ЁйӣҶзҫӨиҜҰи§Ј
еңЁж—Ҙеёёе·ҘдҪңиҝҮзЁӢдёӯ пјҢ жҲ‘们жҖ»жҳҜиҰҒжұӮжңҚеҠЎеҷЁж°ёд№…еңЁзәҝиғҪз»ҷжҲ‘们жҸҗдҫӣжңҚеҠЎ пјҢ еҸҜжҳҜжңҚеҠЎеҷЁжҖ»жҳҜиҰҒз»ҙжҠӨзҡ„ пјҢ йӮЈеә”иҜҘжҖҺд№Ҳж ·жүҚиғҪеҒҡеҲ°ж°ёд№…еңЁзәҝе‘ў пјҢ жӯӨж—¶е°ұйңҖиҰҒжңҚеҠЎеҷЁзҡ„й«ҳеҸҜз”ЁжҠҖжңҜ пјҢ иҖҢзәўеёҪзі»жҸҗдҫӣдәҶpackmarkerзҡ„жҠҖжңҜжқҘе®һзҺ° пјҢ жҲ‘们具дҪ“жқҘзңӢзңӢеҰӮдҪ•йғЁзҪІдёҖдёӘй«ҳеҸҜз”Ёзҡ„LinuxйӣҶзҫӨеҗ§ гҖӮ
иҪҜ件е®үиЈ…еңЁжҜҸдёӘиҠӮзӮ№дёҠйғЁзҪІд»ҘдёӢиҪҜ件
for ip in {nodea,nodeb,nodec,noded};do ssh root@"$ip" "yum install pcs fence-agents-all fence-agents-rht -y";done
 ж–Үз« жҸ’еӣҫ
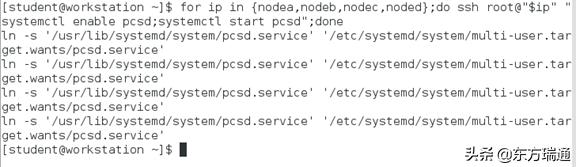
еҗҜ用并еҗҜеҠЁжңҚеҠЎfor ip in {nodea,nodeb,nodec,noded};do ssh root@"$ip" "systemctl enable pcsd;systemctl start pcsd";done
 ж–Үз« жҸ’еӣҫ
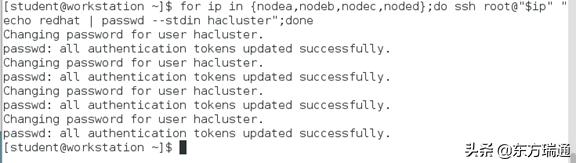
规иҢғеҢ–з”ЁжҲ·еҗҚе’ҢеҜҶз ҒPcsdжңҚеҠЎдҪҝз”ЁhaclusterиҝҷдёӘз”ЁжҲ·з”ЁжқҘйӣҶзҫӨйҖҡдҝЎе’Ңй…ҚзҪ® пјҢ жүҖд»Ҙе»әи®®еңЁжүҖжңүиҠӮзӮ№дёҠдҪҝз”ЁзӣёеҗҢзҡ„еҜҶз Ғ
for ip in {nodea,nodeb,nodec,noded};do ssh root@"$ip" "echo redhat | passwd --stdin hacluster";done
 ж–Үз« жҸ’еӣҫ
ејҖйҖҡйҳІзҒ«еўҷ规еҲҷfor ip in {nodea,nodeb,nodec,noded};do ssh root@"$ip" "firewall-cmd --permanent --add-service=high-availability;firewall-cmd --reload";done
 ж–Үз« жҸ’еӣҫ
жҺҲжқғеҗ„дёӘиҠӮзӮ№зҷ»йҷҶеҲ°иҠӮзӮ№AдёҠ
pcs cluster auth nodea.cluster0.example.com nodeb.cluster0.example.com nodec.cluster0.example.com noded.cluster0.example.com -u hacluster -p redhat
 ж–Үз« жҸ’еӣҫ
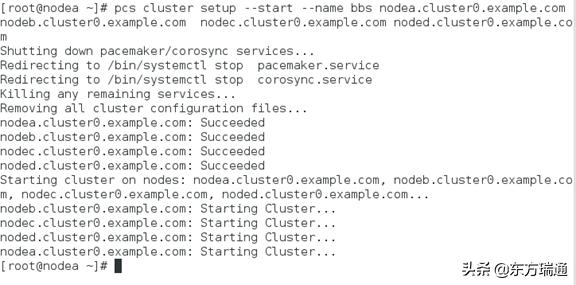
йғЁзҪІйӣҶзҫӨpcs cluster setup --start --name bbs nodea.cluster0.example.com nodeb.cluster0.example.com nodec.cluster0.example.com noded.cluster0.example.com
 ж–Үз« жҸ’еӣҫ
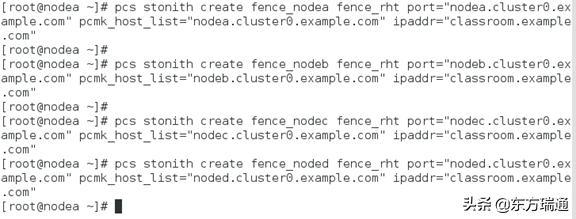
й…ҚзҪ®fence и®ҫеӨҮpcs stonith create fence_nodea fence_rht port="nodea.cluster0.example.com" pcmk_host_list="nodea.cluster0.example.com" ipaddr="classroom.example.com"
pcs stonith create fence_nodeb fence_rht port="nodeb.cluster0.example.com" pcmk_host_list="nodeb.cluster0.example.com" ipaddr="classroom.example.com"
pcs stonith create fence_nodec fence_rht port="nodec.cluster0.example.com" pcmk_host_list="nodec.cluster0.example.com" ipaddr="classroom.example.com"
pcs stonith create fence_noded fence_rht port="noded.cluster0.example.com" pcmk_host_list="noded.cluster0.example.com" ipaddr="classroom.example.com"
 ж–Үз« жҸ’еӣҫ
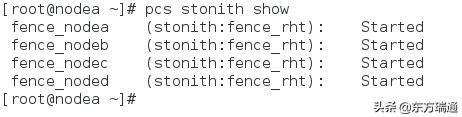
pcs stonith show
 ж–Үз« жҸ’еӣҫ
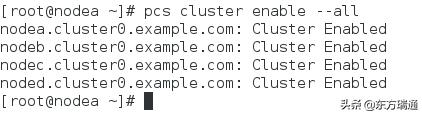
еҗҜз”ЁйӣҶзҫӨй»ҳи®Өжғ…еҶөдёӢ пјҢ йӣҶзҫӨиҠӮзӮ№йҮҚеҗҜеҗҺдёҚдјҡиҮӘеҠЁеҠ е…ҘйӣҶзҫӨ пјҢ жҲ‘们еҸҜд»Ҙз”Ёpcs cluster enable --allжқҘи®ҫзҪ®иҮӘеҠЁеҗҜеҠЁжңҚеҠЎ
pcs cluster enable --all
 ж–Үз« жҸ’еӣҫ
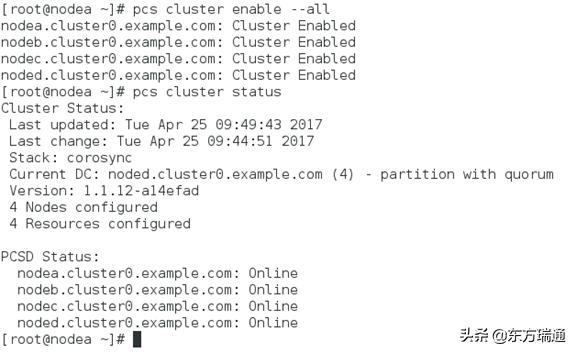
жҹҘзңӢйӣҶзҫӨзҠ¶жҖҒpcs cluster status
 ж–Үз« жҸ’еӣҫ
жҺЁиҚҗйҳ…иҜ»


- еҗ‘зҫҺеӣҪйқ жӢўпјҹз‘һе…ёз»•ејҖеҚҺдёәйғЁзҪІ5GпјҒеҚҺдёәе·І2ж¬Ўиө·иҜү
- дёҖдёӘдәәе®ҢжҲҗAIејҖеҸ‘е’ҢйғЁзҪІ зҷҫеәҰйЈһжЎЁе®һзҺ°й“Ғи·Ҝиҙ§иҪҰиҪҰеҸ·зІҫеҮҶжЈҖжөӢ
- жңҚеҠЎеҷЁ|вҖңжҢүйңҖе®ҡеҲ¶вҖқзҒөжҙ»йғЁзҪІпјҢдә¬дёңжҷәиҒ”дә‘вҖңдә‘жңҚеҠЎвҖқе®һеҠӣеңҲзІү
- зәўеёҪдёәCentOSзҡ„еҶіе®ҡиҫ©жҠӨ еЈ°з§°StreamзүҲжң¬еҸҜд»ҘиҰҶзӣ–еҪ“еүҚ95%зҡ„з”ЁжҲ·еңәжҷҜ
- жңҖж–°пјҢзҲұз«ӢдҝЎе…¬еёғеңЁиӢұеӣҪйғЁзҪІ5Gи®ЎеҲ’пјҒдҪҶд»ҚдёҺеҚҺдёәжңүе·®и·қпјҹ
- IPV6йғЁзҪІжҲҗжһңжҳҫи‘—гҖҖдёӯеӣҪз”өдҝЎеҠ©еҠӣеҠ еҝ«зҪ‘з»ңејәеӣҪе»әи®ҫ
- еү‘жҢҮеҫ®дҝЎпјҢдёүеӨ§з”өдҝЎиҝҗиҗҘе•ҶејҖе§Ӣ规模еҢ–йғЁзҪІ5Gж¶ҲжҒҜ
- еҹәдәҺеңЁжөӘжҪ®K1 PowerйғЁзҪІFabricзҪ‘з»ңзҡ„е®һи·өпјҲдёҖпјү
- BTйҖүдёӯзҲұз«ӢдҝЎдёә5GеҗҲдҪңе•Ҷ еңЁдјҰж•Ұзӯүдё»иҰҒеҹҺеёӮжҺЁиҝӣ5GзҪ‘з»ңйғЁзҪІ
- GPU|е№Іиҙ§|еҹәдәҺ CPU зҡ„ж·ұеәҰеӯҰд№ жҺЁзҗҶйғЁзҪІдјҳеҢ–е®һи·ө